Have you ever wasted an entire day in Photoshop?So have I. It's not like you start out aimlessly. You have a simple goal in mind, like cropping a photo, improving the resolution, or changing the size of the canvas. But then, you see all the options. And before you know it, you're attempting to solve The Riddle of the Sphinx.
Wouldn't it be nice if you could just press a button, and magically, Photoshop would do what you wanted it to do? It turns out there are a wealth of Photoshop shortcuts that do exactly this.
By pressing a few keys on your computer keyboard at the same time, you can select tools, manipulate images and layers, and even make adjustments to your project's canvas. We'll show you how to do all of that (and more) in this guide.
Save all of these shortcuts to your desktop by downloading the PDF version here.
Note: All of these shortcuts can be accessed on PC and Mac, but sometimes, they're different on each operating system. We've included both types below, and in the cases where they might be different, Mac instructions appear in italicized parentheses. Also, in these formulas, the plus sign (+) is present only to represent the combination of key commands. On occasion, it might be part of the command itself, like when you press the plus sign to zoom into a part of an image. Otherwise, don't press the plus sign between commands.
Getting Set Up
You'd think setting up your content in Photoshop would be second nature. But sometimes, the shortcuts to change the background size, or zoom into your project aren't what you think. Here are some of the most crucial fundamental shortcuts to know:
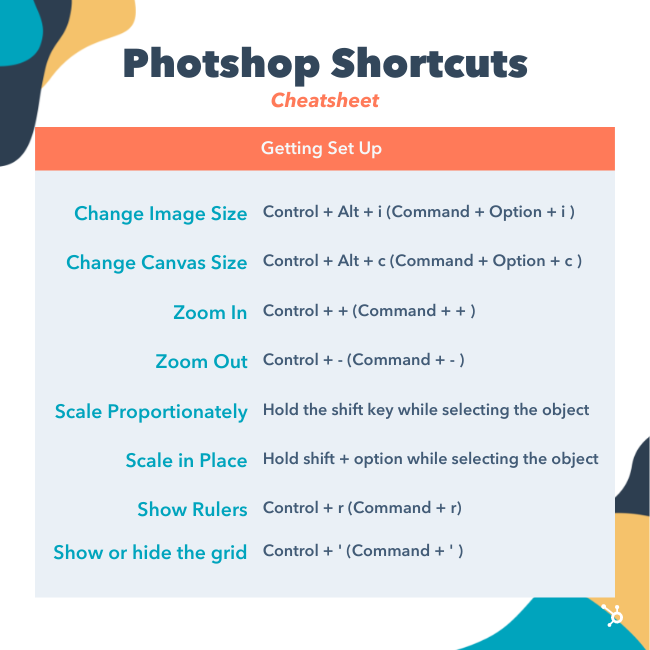
1. Change image size
Control + Alt + i (Command + Option + i )
2. Change canvas size
Control + Alt + c (Command + Option + c )
3. Zoom in
Control + + (Command + + )
4. Zoom out
Control + - (Command + - )
5. Scale Proportionately
Hold the shift key while selecting the object
6. Scale in place (from center of the object)
Hold shift + option while selecting the object
7. Show Rulers
Control + r (Command + r)
8. Show or hide the grid (the automatically-generated horizontal and vertical lines that help align objects to the canvas.)
Control + ' (Command + ' )
Choosing the Right Tools
These shortcuts will activate different groups of tools, like "Lasso," "Brush," or "Spot Healing Brush." Within these tools, though, there are different functions. Under the "Magic Wand" tool group, for example, you have the option to execute a new selection or add and subtract from a current one.
Each one of these tools has a keyboard shortcut, and we've outlined some of them below.
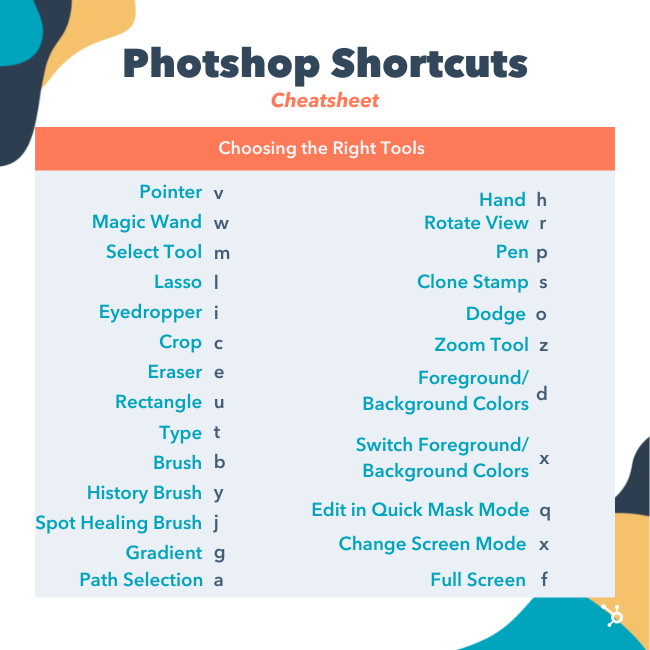
9. Pointer, a.k.a. Move Tool
v
10. Magic Wand
w
11. Rectangular Marquee, a.k.a. the Select Tool
m
12. Lasso
l
13. Eyedropper
i
14. Crop
c
15. Eraser
e
16. Rectangle
u
17. Horizontal Type
t
18. Brush
b
19. History Brush

y
20. Spot Healing Brush
j
21. Gradient
g
22. Path Selection
a
23. Hand
h
24. Rotate View
r
25. Pen
p
26. Clone Stamp
s
27. Dodge
o
28. Zoom Tool
z
29. Default Foreground and Background Colors
d
30. Switch Foreground and Background Colors
x
31. Edit in Quick Mask Mode
q
32. Change Screen Mode
x
33. Full Screen
f
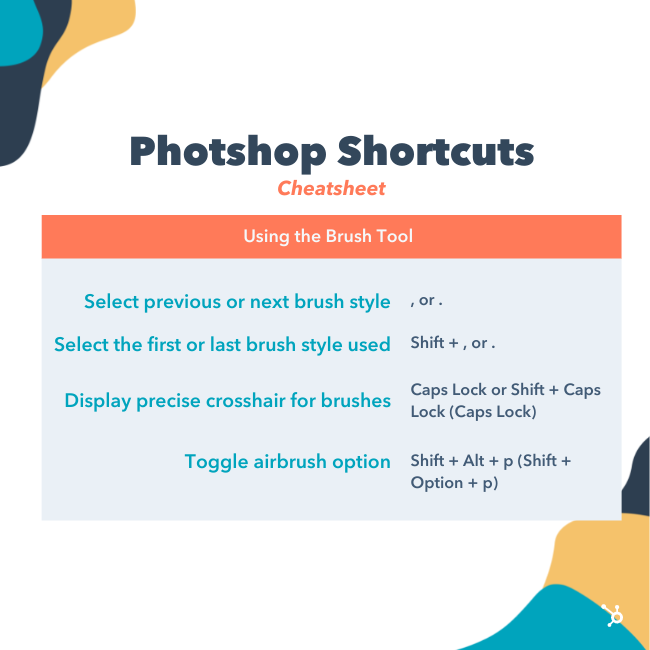
Using the Brush Tool
With the brush settings, you can change the size, shape, and transparency of your brush strokes to achieve a number of different visual effects. To use these keyboard shortcuts, first select the Brush tool by pressing b.
34. Select previous or next brush style
, or .
35. Select the first or last brush style used
Shift + , or .
36. Display precise crosshair for brushes
Caps Lock or Shift + Caps Lock (Caps Lock)
37. Toggle airbrush option
Shift + Alt + p (Shift + Option + p)
Using the Marquee Tool (for Slicing/Selecting)
When used correctly, the marquee tool will let you select individual elements, entire graphics, and determine what is copied, cut, and pasted into your graphics. To use these keyboard shortcuts, first select the Marquee tool by pressing m.
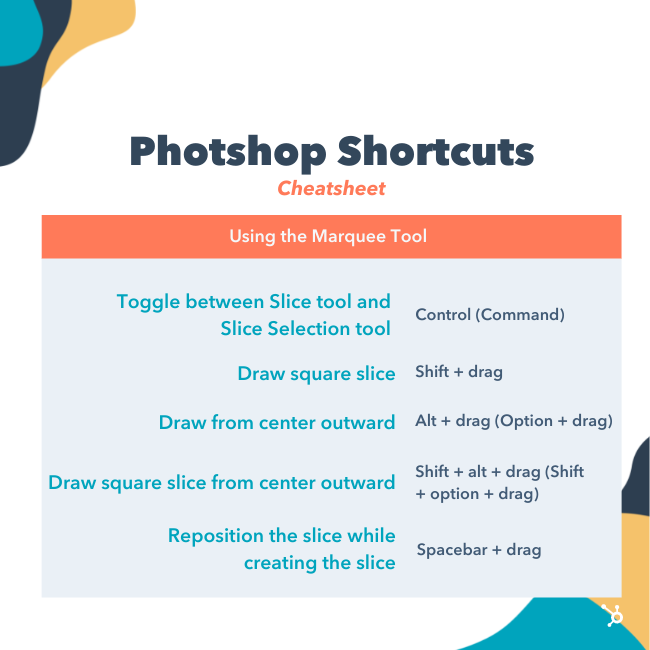
38. Toggle between Slice tool and Slice Selection tool
Control (Command)
39. Draw square slice
Shift + drag
40. Draw from center outward
Alt + drag (Option + drag)
41. Draw square slice from center outward
Shift + alt + drag (Shift + option + drag)
42. Reposition the slice while creating the slice
Spacebar + drag
Using Different Blending Options
Blending options include a number of features to enhance the look of your graphic. You can always choose a blending option by going to the top menu bar, under Layer > Layer Style > Blending Options. Or, you can double-click any layer to bring up the options for that particular layer.
Once you open blending options, you can use keyboard shortcuts to select them without moving your mouse. To use the shortcuts, select the Move tool ("v"), and then select the layer you'd like to use the blending options on. Below are some of the most popular modes.
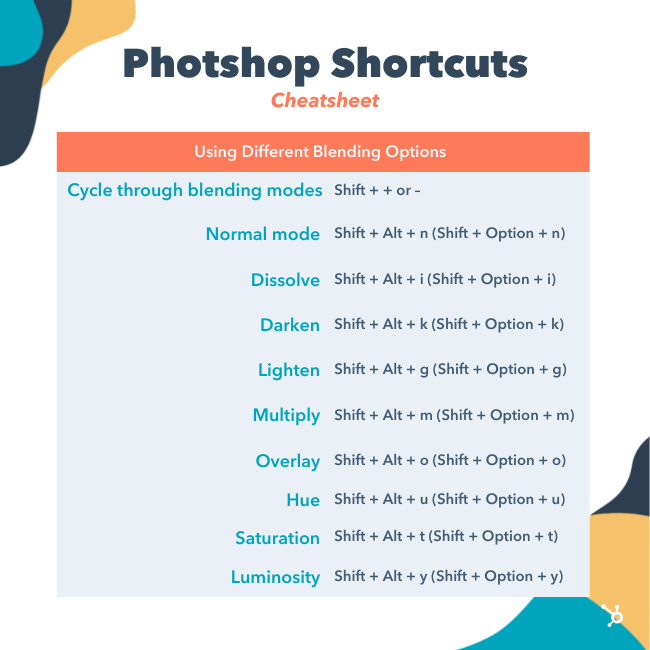
43. Cycle through blending modes
Shift + + or –
44. Normal mode
Shift + Alt + n (Shift + Option + n)
45. Dissolve
Shift + Alt + i (Shift + Option + i)
46. Darken
Shift + Alt + k (Shift + Option + k)
47. Lighten
Shift + Alt + g (Shift + Option + g)
48. Multiply
Shift + Alt + m (Shift + Option + m)
49. Overlay
Shift + Alt + o (Shift + Option + o)
50. Hue
Shift + Alt + u (Shift + Option + u)
51. Saturation
Shift + Alt + t (Shift + Option + t)
52. Luminosity
Shift + Alt + y (Shift + Option + y)
For more niche blending shortcuts, check out these tips from Adobe.
Manipulating Layers & Objects
If you want to modify an object or get complex with multiple layers, here are some shortcuts you might like to know:
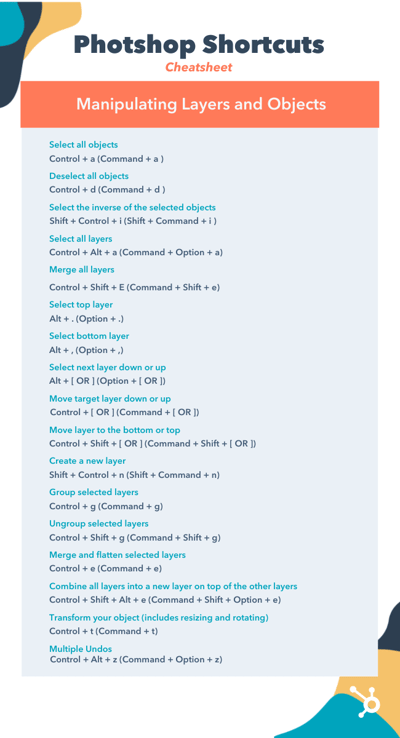
53. Select all objects
Control + a (Command + a )
54. Deselect all objects
Control + d (Command + d )
55. Select the inverse of the selected objects
Shift + Control + i (Shift + Command + i )
56. Select all layers
Control + Alt + a (Command + Option + a)
57. Merge all layers
Control + Shift + E (Command + Shift + e)
58. Select top layer
Alt + . (Option + .)
59. Select bottom layer
Alt + , (Option + ,)
Note: In shortcuts 55-57, the brackets ([ ]) are the keystrokes in the command, and "OR" refers to the actual word — as in, press one bracket OR the other, not the letters "o" and "r."
60. Select next layer down or up
Alt + [ OR ] (Option + [ OR ])
61. Move target layer down or up
Control + [ OR ] (Command + [ OR ])
62. Move layer to the bottom or top
Control + Shift + [ OR ] (Command + Shift + [ OR ])
63. Create a new layer
Shift + Control + n (Shift + Command + n)
64. Group selected layers
Control + g (Command + g)
65. Ungroup selected layers
Control + Shift + g (Command + Shift + g)
66. Merge and flatten selected layers
Control + e (Command + e)
67. Combine all layers into a new layer on top of the other layers
Control + Shift + Alt + e (Command + Shift + Option + e)
Note: This step gets you one, combined layer, with all elements of that layer in separate layers below — which is different from a traditional merge-and-flatten layers command.
68. Transform your object (includes resizing and rotating)
Control + t (Command + t)
69. Multiple Undos
Control + Alt + z (Command + Option + z)
And Finally — Save Your Work for Later
Congratulations — you've finished working on your project, and now, you're ready to share it with the world. Save time-saving your project by using these simple shortcuts:
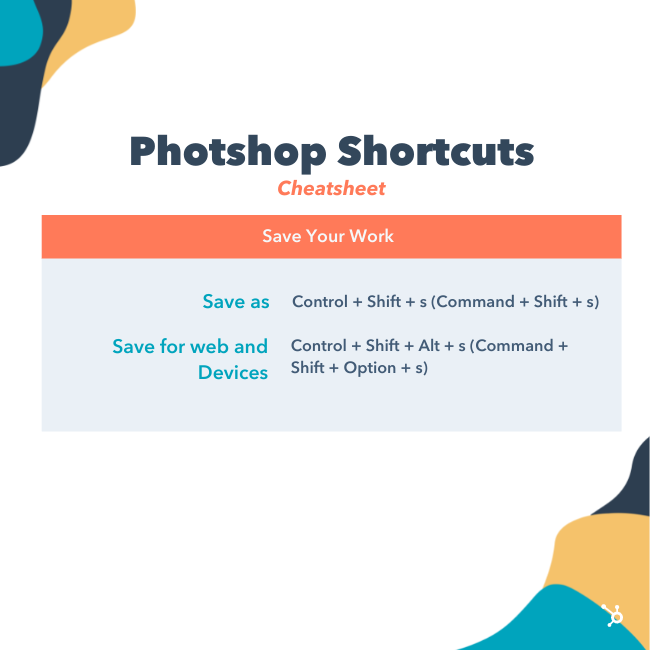
70. Save as
Control + Shift + s (Command + Shift + s)
71. Save for web and devices
Control + Shift + Alt + s (Command + Shift + Option + s)
from Marketing https://blog.hubspot.com/marketing/photoshop-keyboard-shortcuts-list
Have you ever wasted an entire day in Photoshop?So have I. It's not like you start out aimlessly. You have a simple goal in mind, like cropping a photo, improving the resolution, or changing the size of the canvas. But then, you see all the options. And before you know it, you're attempting to solve The Riddle of the Sphinx.
Wouldn't it be nice if you could just press a button, and magically, Photoshop would do what you wanted it to do? It turns out there are a wealth of Photoshop shortcuts that do exactly this.
By pressing a few keys on your computer keyboard at the same time, you can select tools, manipulate images and layers, and even make adjustments to your project's canvas. We'll show you how to do all of that (and more) in this guide.
Save all of these shortcuts to your desktop by downloading the PDF version here.
Note: All of these shortcuts can be accessed on PC and Mac, but sometimes, they're different on each operating system. We've included both types below, and in the cases where they might be different, Mac instructions appear in italicized parentheses. Also, in these formulas, the plus sign (+) is present only to represent the combination of key commands. On occasion, it might be part of the command itself, like when you press the plus sign to zoom into a part of an image. Otherwise, don't press the plus sign between commands.
Getting Set Up
You'd think setting up your content in Photoshop would be second nature. But sometimes, the shortcuts to change the background size, or zoom into your project aren't what you think. Here are some of the most crucial fundamental shortcuts to know:

1. Change image size
Control + Alt + i (Command + Option + i )
2. Change canvas size
Control + Alt + c (Command + Option + c )
3. Zoom in
Control + + (Command + + )
4. Zoom out
Control + - (Command + - )
5. Scale Proportionately
Hold the shift key while selecting the object
6. Scale in place (from center of the object)
Hold shift + option while selecting the object
7. Show Rulers
Control + r (Command + r)
8. Show or hide the grid (the automatically-generated horizontal and vertical lines that help align objects to the canvas.)
Control + ' (Command + ' )
Choosing the Right Tools
These shortcuts will activate different groups of tools, like "Lasso," "Brush," or "Spot Healing Brush." Within these tools, though, there are different functions. Under the "Magic Wand" tool group, for example, you have the option to execute a new selection or add and subtract from a current one.
Each one of these tools has a keyboard shortcut, and we've outlined some of them below.

9. Pointer, a.k.a. Move Tool
v
10. Magic Wand
w
11. Rectangular Marquee, a.k.a. the Select Tool
m
12. Lasso
l
13. Eyedropper
i
14. Crop
c
15. Eraser
e
16. Rectangle
u
17. Horizontal Type
t
18. Brush
b
19. History Brush

y
20. Spot Healing Brush
j
21. Gradient
g
22. Path Selection
a
23. Hand
h
24. Rotate View
r
25. Pen
p
26. Clone Stamp
s
27. Dodge
o
28. Zoom Tool
z
29. Default Foreground and Background Colors
d
30. Switch Foreground and Background Colors
x
31. Edit in Quick Mask Mode
q
32. Change Screen Mode
x
33. Full Screen
f
Using the Brush Tool
With the brush settings, you can change the size, shape, and transparency of your brush strokes to achieve a number of different visual effects. To use these keyboard shortcuts, first select the Brush tool by pressing b.
34. Select previous or next brush style
, or .
35. Select the first or last brush style used
Shift + , or .
36. Display precise crosshair for brushes
Caps Lock or Shift + Caps Lock (Caps Lock)
37. Toggle airbrush option
Shift + Alt + p (Shift + Option + p)
Using the Marquee Tool (for Slicing/Selecting)
When used correctly, the marquee tool will let you select individual elements, entire graphics, and determine what is copied, cut, and pasted into your graphics. To use these keyboard shortcuts, first select the Marquee tool by pressing m.

38. Toggle between Slice tool and Slice Selection tool
Control (Command)
39. Draw square slice
Shift + drag
40. Draw from center outward
Alt + drag (Option + drag)
41. Draw square slice from center outward
Shift + alt + drag (Shift + option + drag)
42. Reposition the slice while creating the slice
Spacebar + drag
Using Different Blending Options
Blending options include a number of features to enhance the look of your graphic. You can always choose a blending option by going to the top menu bar, under Layer > Layer Style > Blending Options. Or, you can double-click any layer to bring up the options for that particular layer.
Once you open blending options, you can use keyboard shortcuts to select them without moving your mouse. To use the shortcuts, select the Move tool ("v"), and then select the layer you'd like to use the blending options on. Below are some of the most popular modes.

43. Cycle through blending modes
Shift + + or –
44. Normal mode
Shift + Alt + n (Shift + Option + n)
45. Dissolve
Shift + Alt + i (Shift + Option + i)
46. Darken
Shift + Alt + k (Shift + Option + k)
47. Lighten
Shift + Alt + g (Shift + Option + g)
48. Multiply
Shift + Alt + m (Shift + Option + m)
49. Overlay
Shift + Alt + o (Shift + Option + o)
50. Hue
Shift + Alt + u (Shift + Option + u)
51. Saturation
Shift + Alt + t (Shift + Option + t)
52. Luminosity
Shift + Alt + y (Shift + Option + y)
For more niche blending shortcuts, check out these tips from Adobe.
Manipulating Layers & Objects
If you want to modify an object or get complex with multiple layers, here are some shortcuts you might like to know:

53. Select all objects
Control + a (Command + a )
54. Deselect all objects
Control + d (Command + d )
55. Select the inverse of the selected objects
Shift + Control + i (Shift + Command + i )
56. Select all layers
Control + Alt + a (Command + Option + a)
57. Merge all layers
Control + Shift + E (Command + Shift + e)
58. Select top layer
Alt + . (Option + .)
59. Select bottom layer
Alt + , (Option + ,)
Note: In shortcuts 55-57, the brackets ([ ]) are the keystrokes in the command, and "OR" refers to the actual word — as in, press one bracket OR the other, not the letters "o" and "r."
60. Select next layer down or up
Alt + [ OR ] (Option + [ OR ])
61. Move target layer down or up
Control + [ OR ] (Command + [ OR ])
62. Move layer to the bottom or top
Control + Shift + [ OR ] (Command + Shift + [ OR ])
63. Create a new layer
Shift + Control + n (Shift + Command + n)
64. Group selected layers
Control + g (Command + g)
65. Ungroup selected layers
Control + Shift + g (Command + Shift + g)
66. Merge and flatten selected layers
Control + e (Command + e)
67. Combine all layers into a new layer on top of the other layers
Control + Shift + Alt + e (Command + Shift + Option + e)
Note: This step gets you one, combined layer, with all elements of that layer in separate layers below — which is different from a traditional merge-and-flatten layers command.
68. Transform your object (includes resizing and rotating)
Control + t (Command + t)
69. Multiple Undos
Control + Alt + z (Command + Option + z)
And Finally — Save Your Work for Later
Congratulations — you've finished working on your project, and now, you're ready to share it with the world. Save time-saving your project by using these simple shortcuts:

70. Save as
Control + Shift + s (Command + Shift + s)
71. Save for web and devices
Control + Shift + Alt + s (Command + Shift + Option + s)


No hay comentarios:
Publicar un comentario